
Overview of the Kenmore 385 Sewing Machine
The Kenmore 385 is a popular, reliable sewing machine, known for its sturdy build and user-friendly design. It’s a versatile machine suitable for various sewing projects.
The Kenmore model 385 sewing machine is a workhorse designed for both beginners and experienced sewers. It’s known for its durability and straightforward operation, making it a popular choice for home use. This mechanical sewing machine offers a range of basic and essential stitches suitable for various fabrics and projects. The machine’s robust construction ensures it can handle regular use, while its user-friendly design makes it easy to learn and master. It typically features a dial for stitch selection, a reverse lever for backstitching, and adjustable stitch length and width. The Kenmore 385 is often favored for its reliability and simplicity, providing a solid foundation for any sewing enthusiast. Its straightforward threading system and clear instructions are beneficial for those new to sewing, but its capabilities also satisfy more advanced users. The model 385 is a testament to Kenmore’s commitment to producing dependable and accessible sewing machines.
Understanding the Machine’s Components
Familiarizing yourself with the Kenmore 385’s parts is crucial for effective operation. Key components include the needle, bobbin, and presser foot which we will explore further.
Essential Parts Identification
Understanding the function of each part of your Kenmore 385 sewing machine is vital for smooth sewing. The needle is the key component that pierces the fabric, and it is secured by the needle clamp. The presser foot holds the fabric in place while sewing, and it can be raised or lowered using the presser foot lever. The feed dogs are located under the presser foot and move the fabric. The bobbin case holds the bobbin, which provides the thread from the bottom. The thread tension dial controls the tightness of the thread. The stitch length dial allows you to adjust the length of your stitches. The handwheel allows for manual control of the needle; The power switch turns the machine on and off. The foot pedal controls the sewing speed. Knowing these parts will greatly improve your sewing experience;
Bobbin Winding and Insertion
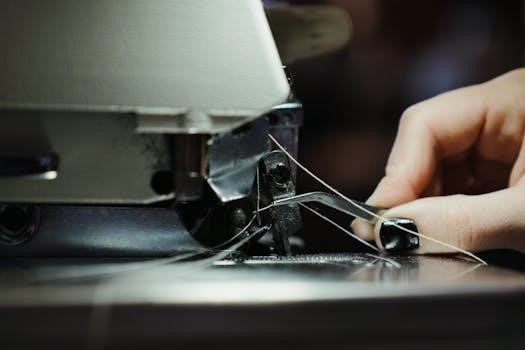
Proper bobbin winding and insertion are essential for seamless sewing. To wind the bobbin, place the thread spool on the spool pin and guide the thread through the thread guides to the bobbin winder tension disc. Then, wrap the thread around the bobbin a few times and place it on the bobbin winder spindle. Engage the bobbin winder by pushing it to the right, and press the foot pedal to start winding. Once wound, remove the bobbin and disengage the winder. For insertion, open the bobbin case and place the bobbin inside, ensuring the thread is correctly positioned. Gently pull the thread through the tension slot and close the bobbin case. Ensure the thread moves smoothly through the machine for proper functionality.
Getting Started with Sewing
Before beginning any project, ensure your Kenmore 385 is correctly threaded and the appropriate stitch pattern is selected for your desired outcome.
Threading the Machine
Correctly threading your Kenmore 385 is crucial for smooth sewing. Begin by placing the thread spool on the spool pin. Guide the thread through the upper thread guides, following the numbered path indicated on the machine. Next, pass the thread down through the tension disks, ensuring it is firmly seated between them. Then, guide the thread down and around the take-up lever, making sure the thread is securely engaged. Continue by bringing the thread down toward the needle, using the lower thread guide just above the needle. Finally, thread the needle from front to back. It’s important that the thread moves freely through each point. Double-check all threading paths to prevent issues like thread breakage or skipped stitches. Refer to your machine’s diagram to confirm the correct path.
Selecting Stitch Patterns
The Kenmore 385 offers a variety of stitch patterns to suit different sewing needs. To select a stitch, locate the stitch selector dial on your machine. Rotate the dial to align the desired stitch pattern with the indicator. Common stitch options include straight stitch, zigzag stitch, and potentially a few decorative patterns. The length and width of the stitch are adjusted using separate dials or levers, allowing for customization. Consult your machine’s manual to understand the purpose of each stitch setting and to determine the optimal stitch length and width for your chosen fabric. It’s recommended to test stitch on a scrap piece of fabric before starting your main project. This ensures your settings are correct and provides the desired outcome. Proper stitch selection contributes to seam strength and the overall appearance of your sewing project.
Basic Sewing Techniques
Mastering basic techniques is crucial for successful sewing. These include creating straight seams, using the zigzag stitch for finishing edges, and controlling fabric while sewing.
Straight Stitching and Seams
The straight stitch is the foundation of most sewing projects, essential for creating seams, hems, and general construction. To begin, ensure your machine is properly threaded and the correct presser foot is attached. Select the straight stitch setting on your Kenmore 385. Place the fabric under the presser foot, aligning the edge with the desired seam allowance marking on the needle plate. Gently press the foot pedal to start sewing, maintaining a consistent speed and guiding the fabric smoothly. Keep the fabric’s edge aligned with the guide to ensure a straight seam. Backstitch at the beginning and end of each seam to secure the stitching, preventing it from unraveling. For longer seams, you may want to periodically pause and check your progress, making sure the fabric is feeding evenly. Practice on scrap fabric until you are comfortable with controlling the speed and direction of your stitching. Consistent practice will lead to straighter, more professional-looking seams.
Zigzag Stitching and Finishing
The zigzag stitch on your Kenmore 385 is incredibly versatile, used for finishing raw edges, creating decorative stitches, and applying appliques. To start, select the zigzag stitch setting and adjust the stitch width and length as needed. For finishing raw edges, position the fabric so the zigzag stitch catches the edge, preventing fraying. When working with delicate fabrics, test the stitch settings on a scrap to avoid puckering. For decorative purposes, experiment with different zigzag widths and lengths to create unique patterns. When applying appliques, a narrow zigzag stitch works well to secure the edges. Practice moving the fabric smoothly while zigzag stitching to maintain a consistent stitch. Remember to always backstitch at the beginning and end to secure the stitching. A correctly executed zigzag stitch enhances both the durability and aesthetics of your sewing projects.
Troubleshooting Common Issues
This section addresses frequent problems like thread breakage, tangles, and needle issues. We provide practical solutions to get your Kenmore 385 running smoothly again.
Thread Breakage and Tangles
Experiencing thread breakage or tangles is a common frustration for sewers, and the Kenmore 385 is no exception. These issues can often be attributed to several factors. One frequent cause is improper threading of the machine; ensure that the thread is correctly routed through all the tension discs and guides, as per the manual’s instructions. Another culprit could be the thread itself; old or low-quality thread is prone to breaking. Always use good quality thread appropriate for the fabric you’re using. The tension of the machine may also be incorrect. Check your tension settings, making sure they’re suitable for the fabric weight and thread being used. Also, examine your bobbin, ensuring it’s wound smoothly and consistently, with no loose ends that could cause tangling. If the thread is catching on any burrs or rough spots along its path, this can also lead to problems. Finally, the needle may be damaged, bent or improperly inserted. Try a fresh needle and ensure it is fully inserted before you sew.
Needle Problems and Solutions
Needle issues are a frequent cause of sewing machine malfunctions, and the Kenmore 385 is not immune. A bent or dull needle is a common problem, leading to skipped stitches, broken threads, or even fabric damage. Always replace your needle regularly, especially after working with thick fabrics or when you notice any signs of wear. Ensure the needle is the correct type and size for the material you are sewing; using the wrong needle can cause breakage and other problems. Incorrect needle insertion is another potential issue; make sure the needle is fully inserted into the needle clamp and the flat side of the needle is correctly aligned as instructed in the manual. If the needle is hitting the needle plate, it indicates a problem. This could be due to the wrong needle being used, or the needle being improperly installed. Always check for any debris around the needle area, which may be causing issues. Also ensure that the presser foot is correctly attached. Lastly, if the needle breaks, carefully remove all broken parts to avoid future issues.
Maintenance and Care
Regular maintenance is essential for the longevity of your Kenmore 385. Proper cleaning and lubrication will keep it running smoothly and prevent costly repairs.
Cleaning and Oiling the Machine
To ensure your Kenmore 385 operates smoothly, regular cleaning and oiling are crucial. Begin by unplugging the machine and removing the needle and presser foot. Use a small brush or lint brush to gently remove accumulated dust and lint from the bobbin area, feed dogs, and all accessible parts of the machine. Pay close attention to crevices where debris tends to gather. Avoid using canned air, as it can push lint further into the machine’s mechanisms. Once cleaned, apply a few drops of sewing machine oil to designated oiling points. Consult your manual for the exact locations, usually indicated by small arrows or dots. Typically, these include the bobbin race, needle bar, and other moving parts. Use only sewing machine oil; other lubricants can damage your machine. After oiling, run the machine slowly for a few minutes on a scrap piece of fabric to distribute the oil and remove any excess. This routine should be performed regularly, ideally every few sewing sessions, or when the machine starts to sound sluggish.
Regular Service Tips
Beyond cleaning and oiling, several practices ensure your Kenmore 385’s longevity. Always use the correct needle type and size for your fabric to prevent damage and skipped stitches. Change needles frequently, even if they don’t appear damaged, as they dull with use. Store your machine in a dust-free environment, preferably covered when not in use. Periodically check the tension settings and adjust them as needed for different fabrics. If you notice unusual noises or vibrations, it’s best to consult a qualified sewing machine technician. Avoid forcing the machine if it encounters resistance; instead, check for thread jams or other obstructions. Keep the power cord in good condition to prevent electrical issues. Finally, always refer to your Kenmore 385 manual for specific service recommendations and troubleshooting advice. Following these tips will help keep your machine running smoothly for years to come.
Advanced Features and Accessories
The Kenmore 385 offers various optional attachments to expand its functionality. These include specialized feet for tasks like hemming, quilting, and zipper insertion, enhancing your sewing capabilities.
Exploring Optional Attachments
The Kenmore 385 sewing machine’s versatility can be significantly enhanced through the use of various optional attachments. These attachments are designed to assist with specific sewing tasks, making your projects easier and more professional. For instance, a zipper foot allows for precise stitching along the zipper teeth, ensuring a clean and secure finish. A buttonhole foot creates consistent and accurate buttonholes, eliminating the frustration of manual measurement and stitching. The walking foot, also known as an even-feed foot, is particularly useful when working with multiple layers of fabric or slippery materials as it helps to feed all the layers evenly, preventing shifting and puckering. A hemming foot makes quick work of creating neat and consistent hems on garments. Additionally, specialty feet are available for tasks such as quilting, allowing for greater creativity in your projects. The use of these attachments will broaden your sewing capabilities and help you to achieve results that are both functional and visually appealing. Exploring these options allows you to maximize the potential of your Kenmore 385.
Related Posts
craftsman 3000i generator manual
Craftsman 3000i Generator Manual⁚ Overview This manual provides comprehensive guidance…


pit boss owner’s manual
Pit Boss manuals are essential guides for operating and maintaining…