HP OfficeJet Pro 8100 User Manual: A Comprehensive Guide
This manual provides detailed instructions for setting up, using, and maintaining your HP OfficeJet Pro 8100 printer, ensuring optimal performance and longevity.
Welcome to the HP OfficeJet Pro 8100, a powerful and versatile all-in-one printer designed to enhance your productivity. This printer combines high-speed printing, scanning, and copying capabilities in a sleek and compact design.
This user manual serves as a comprehensive guide to help you quickly set up and utilize all the features of your new printer. Whether you’re a home user or operate a small business, the HP OfficeJet Pro 8100 is engineered to deliver professional-quality results consistently. Explore the following sections to unlock its full potential and streamline your workflow.
Unboxing and Initial Setup
Carefully unpack your HP OfficeJet Pro 8100, ensuring all packing materials are removed from both inside and outside the printer. Inspect the box for any visible damage incurred during shipping. Retain the original packaging for potential future transport or warranty claims.
Before proceeding, locate a stable and level surface near a power outlet. Avoid direct sunlight and excessive moisture. The initial setup involves connecting the power cord and preparing the printer for its first use. Follow the subsequent steps in this manual for a seamless and trouble-free experience.
Package Contents Verification

Confirm all components are present before proceeding with setup. Your HP OfficeJet Pro 8100 package should include the printer itself, a power cord, print cartridges (black and tri-color), a setup poster, and a reference guide. Check for a USB cable; it may be sold separately.

Inspect each item for damage. If anything is missing or appears defective, immediately contact HP support or your retailer. Retain all packaging materials until you’ve verified the complete contents and are satisfied with the condition of your new printer; Accurate verification ensures a smooth start.
Hardware Installation
Carefully remove the printer from its packaging, discarding all protective materials. Place the printer on a stable, level surface with adequate ventilation. Avoid direct sunlight and excessive moisture.
Connect the power cord to the printer and a wall outlet. Do not turn the printer on yet. Ensure the paper trays are properly inserted and secured. Locate the cartridge access door and prepare to install the ink cartridges as detailed in the following section. Proper installation prevents damage and ensures optimal functionality.
Initial Power-Up and Configuration
Press the power button to initiate the printer’s startup sequence. The HP OfficeJet Pro 8100 will perform a self-test, which may take a few minutes. Follow the on-screen prompts to select your language, country, and time zone settings.
The printer will then guide you through network configuration. Choose between wireless or wired (Ethernet) connection. If selecting wireless, ensure your network name (SSID) is visible. Complete the setup using the control panel, and print a test page to verify functionality.
Understanding the Control Panel
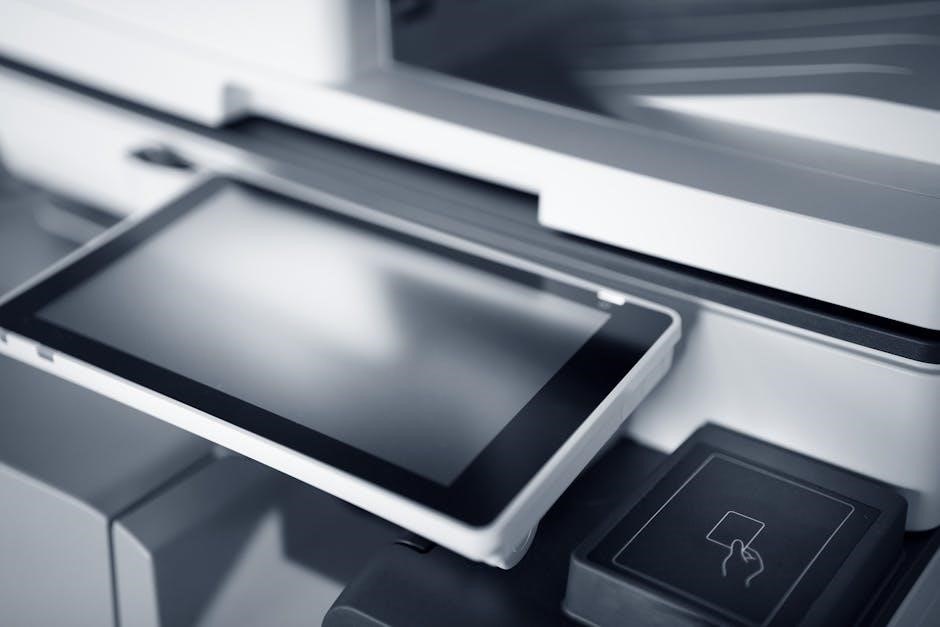
The HP OfficeJet Pro 8100 features an intuitive control panel for easy operation. It includes a color touchscreen display and several physical buttons. The touchscreen provides access to all printer functions, settings, and status information.
Physical buttons typically include power, cancel, and home/back functions. Use the touchscreen to navigate menus, select options, and initiate tasks like printing, scanning, and copying. Familiarize yourself with the layout for efficient control and troubleshooting. The control panel is your primary interface for managing the printer.
Display Screen Overview

The HP OfficeJet Pro 8100’s color touchscreen is the central hub for printer control. It displays printer status, including ink levels, paper supply, and connection status. The home screen offers quick access to common tasks like printing, scanning, and copying.
Navigation is intuitive, utilizing icons and menus. Settings menus allow customization of print quality, network configurations, and security features. Error messages and troubleshooting guidance are also displayed here. The screen provides a visual representation of printer activity and facilitates easy management.
Button Functions and Navigation
The HP OfficeJet Pro 8100 features a streamlined button layout complementing the touchscreen. The Power button initiates startup and shutdown sequences. The Cancel button halts current print or scan jobs. Dedicated buttons for Home and Back provide quick navigation within the touchscreen interface.
These physical buttons offer tactile control, supplementing touchscreen interactions. Combined with the intuitive on-screen prompts, navigating menus and initiating functions is straightforward. The buttons are strategically placed for easy access, enhancing overall usability and control of the printer.
Connecting to a Network (Wireless & Wired)
The HP OfficeJet Pro 8100 offers versatile connectivity options, supporting both wireless and wired network configurations. Wireless setup allows for convenient placement without physical cable constraints. Alternatively, a wired Ethernet connection provides a stable and potentially faster network link;
Establishing a network connection enables features like remote printing and scanning. The printer supports standard Wi-Fi protocols for seamless integration with existing wireless networks. Detailed instructions for both wireless and Ethernet setups are provided in the following sections, ensuring a hassle-free connection process.
Wireless Setup Wizard
The HP OfficeJet Pro 8100 simplifies wireless connectivity through its integrated Wireless Setup Wizard. Access this wizard directly from the printer’s control panel, navigating through the network settings menu. The wizard guides you step-by-step, searching for available wireless networks in your area.
Select your network from the list and enter the corresponding password when prompted. The printer will then attempt to connect, displaying the connection status on the screen. Successful connection enables wireless printing and scanning. Refer to the troubleshooting section if issues arise during this process.
Ethernet Connection Instructions
For a stable, wired network connection, utilize the Ethernet port on your HP OfficeJet Pro 8100. First, connect one end of an Ethernet cable to the printer’s Ethernet port and the other end to an available port on your router or network switch.
The printer will automatically detect the connection and obtain an IP address, often through DHCP. Verify the connection status on the printer’s control panel. If necessary, manually configure IP settings via the network menu. A wired connection offers enhanced security and speed.
Installing Drivers and Software

To unlock the full potential of your HP OfficeJet Pro 8100, installing the correct drivers and software is crucial. Begin by downloading the full feature software package from the HP support website, ensuring compatibility with your operating system.
Run the downloaded installer and follow the on-screen prompts. The software includes printer drivers, scanning utilities, and helpful diagnostic tools. A successful installation enables advanced features like duplex printing and mobile printing. Restart your computer after installation for optimal performance.
Downloading the Latest Drivers
Ensuring you have the most current drivers for your HP OfficeJet Pro 8100 is vital for optimal performance and compatibility. Visit the official HP support website – support.hp.com – and navigate to the driver download section.
Enter your printer model number (8100) and select your operating system. The website will identify and offer the latest available drivers. Download the full feature software package for complete functionality. Regularly checking for updates guarantees access to bug fixes and enhanced features.
Software Installation Process

After downloading the full feature software package, locate the downloaded file (typically an .exe file) and double-click to begin the installation. Follow the on-screen prompts, accepting the license agreement and choosing your installation preferences.
The installer will guide you through connecting your HP OfficeJet Pro 8100, either via USB or network. Ensure the printer is powered on during this process. Once complete, test the installation by printing a test page to verify functionality and confirm successful setup.
Paper Handling and Media Types
The HP OfficeJet Pro 8100 supports a variety of paper types, including plain paper, envelopes, labels, and photo paper. Proper paper handling is crucial for optimal print quality and to avoid paper jams. Ensure paper is loaded correctly into the input trays, aligning the edges with the paper guides.
Avoid overfilling the trays. This printer accommodates multiple paper sizes, and the control panel allows you to select the appropriate media type for each print job, ensuring accurate color and text reproduction.
Supported Paper Sizes and Weights
The HP OfficeJet Pro 8100 handles a diverse range of paper sizes, including standard US Letter (8.5 x 11 inches), Legal (8.5 x 14 inches), and Executive (7.25 x 10.5 inches). It also supports various international sizes. Recommended paper weights range from 20 to 24 lb for standard paper, and up to 32 lb for heavier specialty papers.
Using paper outside these specifications may lead to feeding issues or reduced print quality; Always check the printer settings to confirm the selected paper size and type match the loaded media.
Loading Paper into the Trays
To load paper, first extend the paper tray and adjust the paper guides to match the width of your paper stack. Ensure the paper is neatly stacked and not overfilled. Gently fan the paper before loading to prevent sticking. The main input tray typically holds up to 250 sheets of standard paper.
For specialty papers, consult the paper specifications for tray limitations. Always align the paper edges properly for smooth feeding and optimal print results.
Using the Automatic Document Feeder (ADF)
The ADF simplifies copying and scanning multiple pages. Lift the ADF cover and fan the stack of paper before loading it into the tray. Adjust the paper width guides to securely hold the documents. Ensure the paper is aligned and not curled or damaged.
The ADF supports various paper sizes and weights; check specifications for limits. When scanning, select the ADF as the source in your software. For duplex scanning, enable the two-sided scanning option within the settings.
Printing Basics
Initiating a print job is straightforward. First, ensure your printer is connected and powered on. Open the document you wish to print from your computer or mobile device. Select “Print” from the File menu, or use the appropriate print option on your device.
Choose the HP OfficeJet Pro 8100 from the list of available printers. Adjust print settings like paper size, quality, and color options. Preview your document before finalizing the print. Click “Print” to begin the printing process.
Printing from a Computer
To print from a computer, first, verify the HP OfficeJet Pro 8100 is connected via USB or network. Open the desired document – Word, PDF, or image – on your computer. Navigate to “File” and select “Print.” A print dialog box will appear.
Select your printer from the available options. Customize settings like page orientation, number of copies, and print quality. Utilize advanced options for duplex printing or specific paper types. Preview the document and click “Print” to start the process.
Printing from Mobile Devices
Printing wirelessly from your smartphone or tablet is easily achievable with the HP OfficeJet Pro 8100. Ensure your mobile device is connected to the same Wi-Fi network as the printer. Download and install the HP Smart app from your app store (iOS or Android).
Open the HP Smart app and follow the on-screen instructions to add your printer. Select the document or image you wish to print, and customize print settings within the app. Tap the “Print” icon to begin printing wirelessly.

Scanning and Copying
The HP OfficeJet Pro 8100 offers versatile scanning and copying functionalities. To scan, place your document on the scanner glass or utilize the Automatic Document Feeder (ADF) for multi-page scans. Access scanning options through the printer’s control panel or the HP Smart app on your connected device.
For copying, select the “Copy” function on the control panel, adjust settings like number of copies and quality, and press “Start.” Both scanning and copying support various document and image formats, providing flexibility for your needs.
Scanning to a Computer
Scanning to your computer with the HP OfficeJet Pro 8100 is straightforward. Ensure your printer and computer are connected via USB or network. Utilize the HP Smart app or the printer’s control panel to initiate a scan. Select your computer as the destination, choose your desired scan settings (resolution, format, color/grayscale), and click “Scan.”
The scanned document will be saved directly to your computer, typically in the “Documents” or “Scans” folder. You can customize the save location within the scanning software preferences.
Copying Documents and Images
The HP OfficeJet Pro 8100 facilitates quick and easy document and image copying. Place the original document on the glass or within the Automatic Document Feeder (ADF). On the printer’s control panel, select the “Copy” function. Adjust settings like copy quality, number of copies, and paper size as needed.

Press the “Start Copy” button to begin the copying process. The printer will automatically produce the desired number of copies. For duplex (two-sided) copying, ensure this option is enabled in the copy settings.
Troubleshooting Common Issues
Encountering issues with your HP OfficeJet Pro 8100? This section addresses frequent problems. Paper jams are often resolved by carefully removing the jammed paper, following the printer’s display prompts. For print quality problems, check ink levels and nozzle settings via the printer software.
Connectivity issues can usually be fixed by restarting the printer and your network router. Ensure the correct network is selected. Refer to the HP support website for detailed troubleshooting guides and driver updates if problems persist.
Paper Jams
Paper jams are a common issue, but easily addressed. First, power off the HP OfficeJet Pro 8100. Gently remove any visible paper from the input trays, output area, and the automatic document feeder (ADF).
Inspect the paper path carefully for small scraps. Consult the printer’s display panel for specific jam locations and instructions. Avoid using excessive force when removing paper to prevent damage. Ensure you’re using supported paper types and weights to minimize future jams.
Print Quality Problems
Suboptimal print quality can stem from several factors. Begin by checking ink levels and replacing cartridges if low. Run the printer’s built-in cleaning utility to clear clogged printhead nozzles – access this through the control panel.
Verify paper type settings within your print driver match the paper loaded. Adjust print quality settings (Draft, Normal, Best) for desired results. For faded prints, increase print darkness. Streaks or banding may indicate a printhead alignment issue; use the alignment tool.
Connectivity Issues
Experiencing connection problems? First, ensure the printer is powered on and within range of your wireless network. Verify your network password is correct during wireless setup. For wired connections, check the Ethernet cable is securely connected to both the printer and router.
Restart both the printer and your router. Confirm the printer is selected as the default printer on your computer. Update the printer’s firmware through the HP support website. If issues persist, temporarily disable firewalls or security software to test for interference.